Code Robo
- Generate Java Code To Parse XML
- Generate Java Code To Parse JSON
- XSLT(XSL) Code Generator
- XSLT To Produce JSON(*New)
- REST API/Service Code End To End (Spring boot/MVC)(*New)
- XML To POJO(Java Bean)
- XML To JavaBean
- XML To XSD (XSD From XML)
- XML To XPath (Gen XPath)
- XSD To XML(XML From XSD)
- XSD To Java Bean(POJO)(*New)
- JSON To Java Bean
- JSON To POJO(Java Bean)
- JSON To JavaScript
- JSON To Angular Code(*New)
- JSON To AngularJS Code
- JSON Path Generator
- JSON To JSON Schema(*New)
- JSON Schema To JSON(*New)
- Generate DAO Code(SQL To Java)
- Generate JUnit TestCase(*New)
Formatter
Comparator
Tester
Merger
Converter
- Base64 To Text / Text To Base64
- Base64 To Image (*New)
- CSV To XML
- CSV To JSON
- JSON To YAML
- JSON To XML
- JSON To Text
- JSON To MappingDoc
- JSON To Excel
- JSON To Property
- Property To YAML
- Property To JSON
- SQL To JSON / XML (*New)
- XML To Excel
- Text To HTML
- XML To JSON
- XML To Mapping Doc
- XML To Template
- XML To Text
- YAML To Property
- YAML To JSON
Utility
Java Code Complience
Validator
EncoderDecoder
Virtual Service
How to run SUDO command in WinSCP |
Talk to EasyAssistant |
How do I login as a root in WinSCP.
This page tells you how to connect in WinSCP with root user or how to run sudo su command from WinScp after login. I was connecting through WinSCP to transfer files from my windows laptop to a RED Hat linux machine in AWS cloud. I was using private key for authentication. However the files was not getting transfered as the user account to be used had to have root access. For this task, We need to elevate to root user after login.Now question is how can I elevate a loged in user to root user in WinScp (SFTP) or How can I run sudo su When I am using WinScp to upload or downlod files.
Good news is that , WinSCP can elevate loged in user to root after login if we set up some values;
Please follow the following steps.
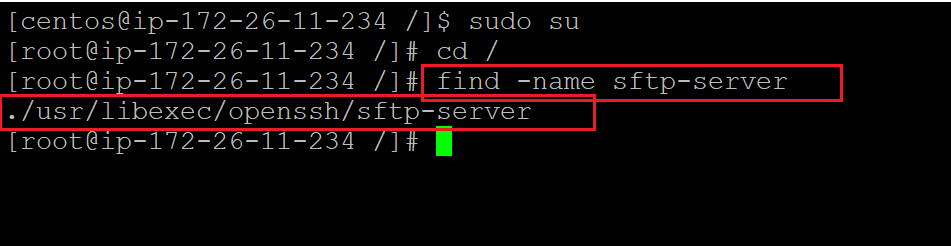
1. Login to your linux m/c using Putty and find location of sftp-server location. It varies from OS to OS
 sudo su
 cd /
 find -name sftp-server
In my linux (RedHat)m/c path is : /usr/libexec/openssh/sftp-server
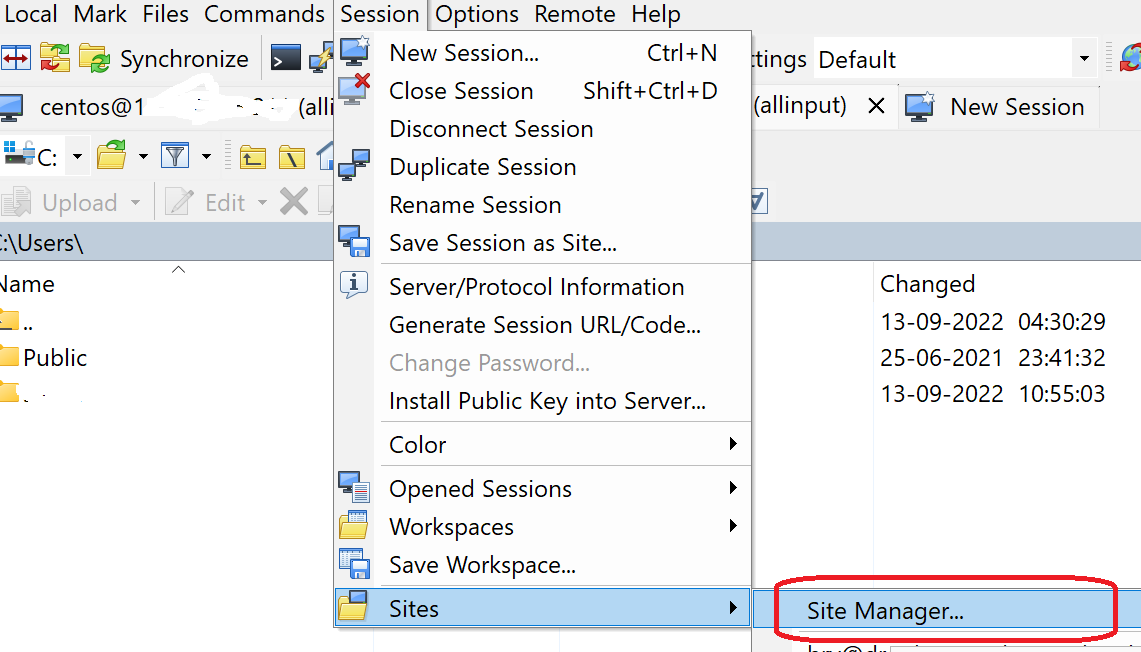
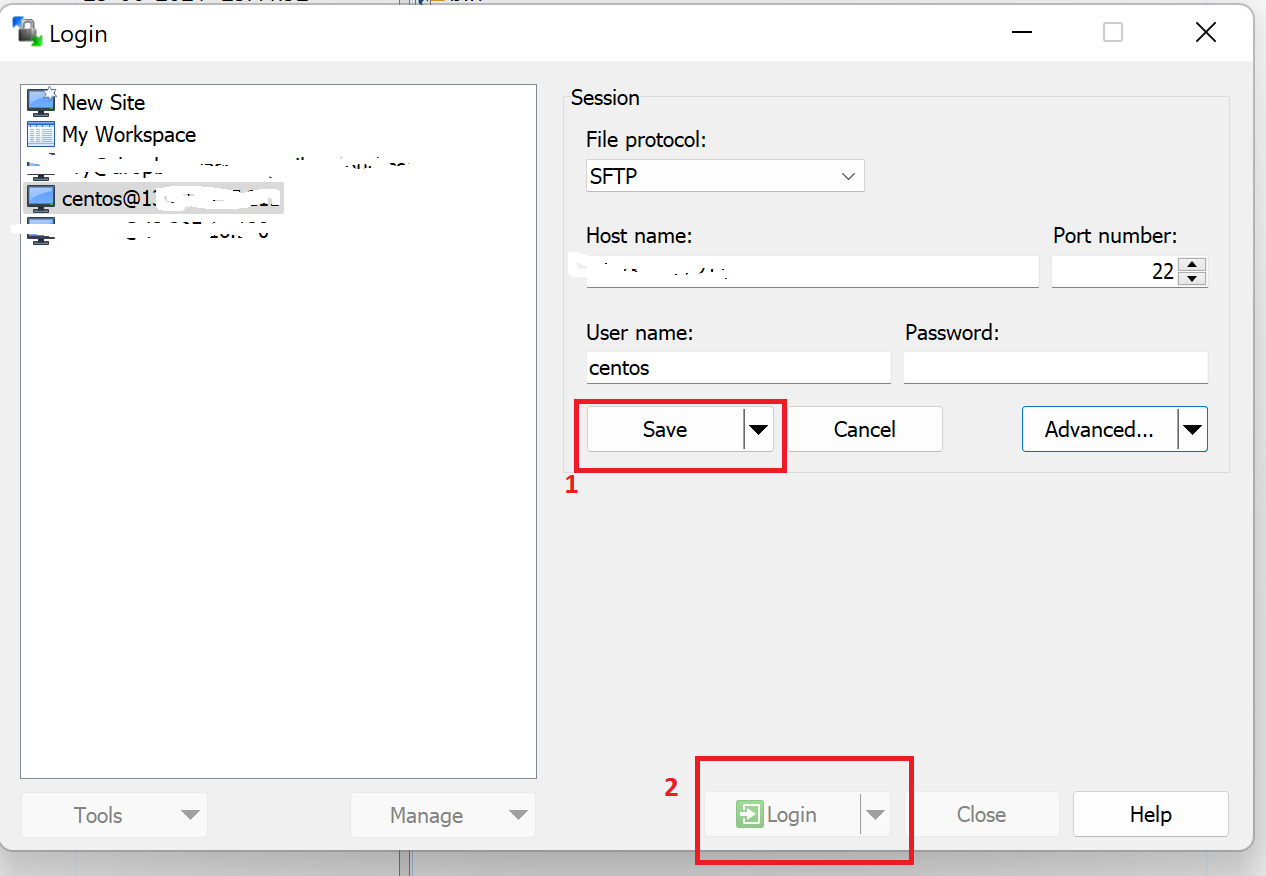
2. Open WinScp. Navigate to (Session > Sites > Site Manager)
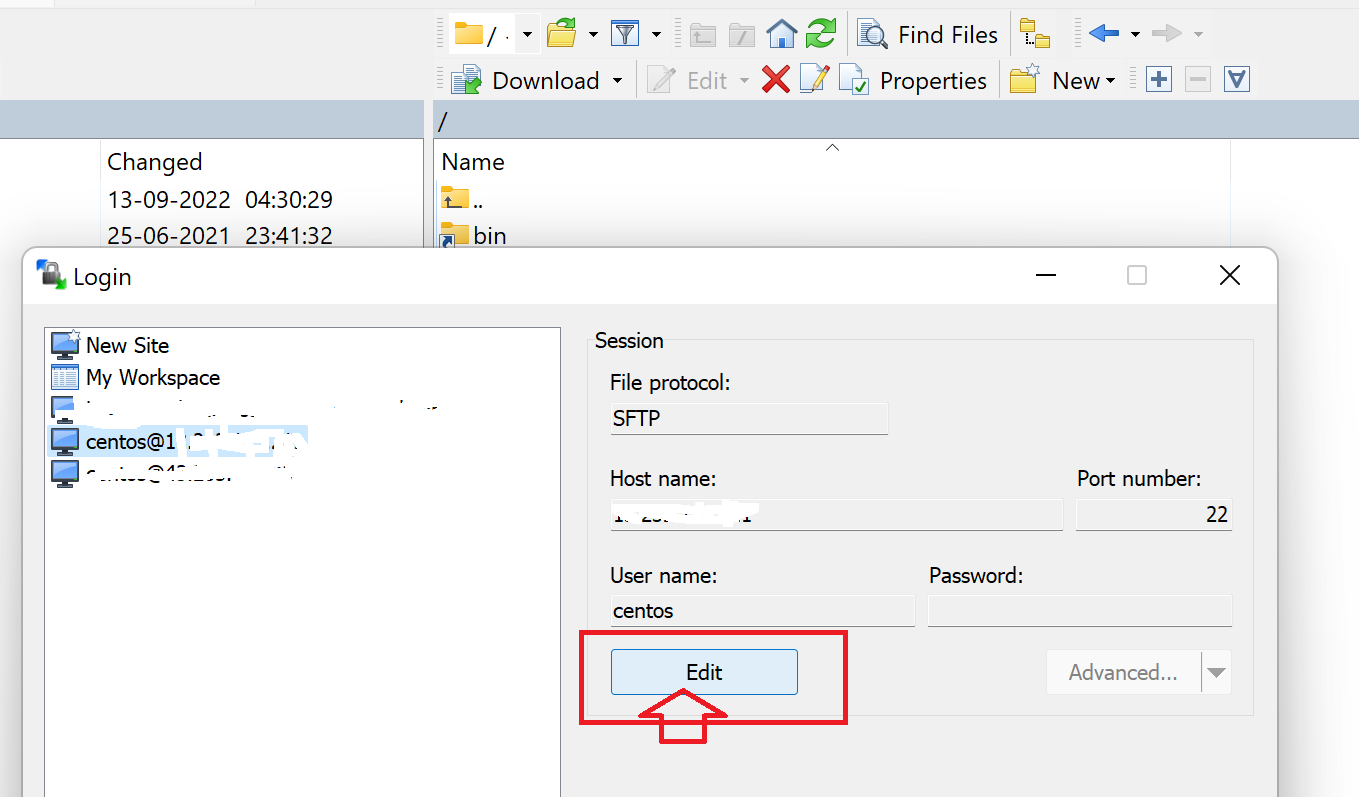
3. Select the saved session and click on the "Edit" button.
4. Click on Advanced button. Then navigate to SFT > SFTP Server.
Set the value sudo su -c /usr/libexec/openssh/sftp-server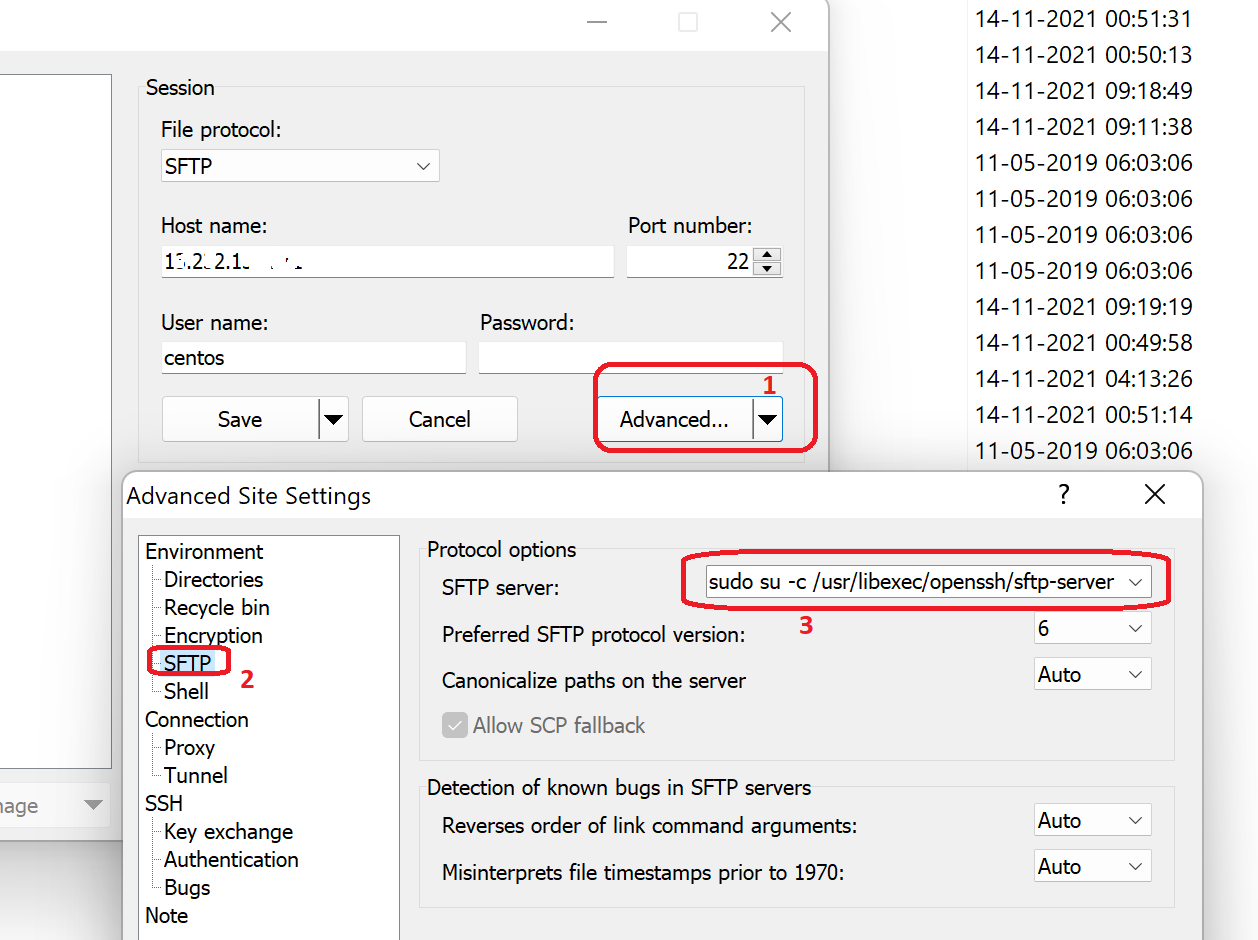
5. Save the value and login.
Now you should be logged in succesfully and current user will be elevated to root user. I mean current user will have root access.
| Post Your Comment: |